The 3 Keys to Unlocking Your Fastest Triathlon Bike Split
Proper bike fit, optimized contact points like saddle and bars, and strategically chosen aero gear are the top three factors to target for your fastest bike time.

Let’s assume that you have lost some weight and done some training. Sure, it’s not nearly as exciting as buying a new set of race wheels or some ceramics, but it’s still the biggest determinant of how fast you’re going to go on race day. We could put Luke Bell on a 1983 Redline BMX and still expect him to beat most of the field; depressing as it is, working on the engine is still going to yield the greatest results. For the rest of this discussion, though, we’re going to put fitness and genetics to one side and concentrate on what else you can do to get the best bike split, and we’re also going to keep one eye on the run leg as well because the fastest bike leg is useless if you can’t finish the job.
Bike Fit
This is the most important of the three pillars. Your bike is a delivery mechanism for a running race. Its job is to get you to the start of the run as efficiently as possible. In a triathlon sense, this is a bit different to a cycle race where outright speed is king. For any distance triathlon, the bike needs to get us to the start of the run quickly but not at the expense of running pace, so it’s an exercise in efficiency. How fast you go on the bike and how well you feel when you get off it is largely a result of bike fit. Forget aero tubes; we could weld up a frame out of old lead pipe and, if the geometry was spot on, you would have a much better race than if you’d just dropped $12,000 on a new rig that didn’t fit you.
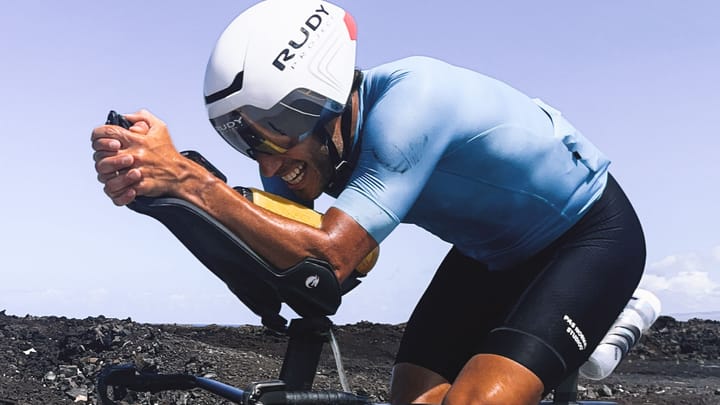
The whole point of correct bike fit is to find a frame that supports you comfortably in the aero position for the duration of the bike leg. One of the reasons that the wind tunnel can cause as many problems as it solves for triathletes is because it will drive a position that might be more aero but is unsustainable for the duration of the bike leg. Even an Olympic distance tri means being aero for a bit over an hour for most of us, and it’s very hard to run off the bike if you’ve been in agony for an hour trying to hold an aero position that is too aggressive. Sadly, many bike fits and bike fitters think that the bike leg in a triathlon is the same as a time trial (like you see at le Tour). It’s not. The positions look vaguely familiar (the skiers tuck) but that is where it ends. A good triathlon position will generally use steeper seat angles, higher bar positions and a more compressed cockpit dimension than a pure TT position. It will also be a whole lot more comfortable than a TT position. Have a close look at a pro tour time trial rider at the end of the time trial – they’re not running anywhere.
So, assuming you’re doing some training and you’ve stopped putting pies in your mouth, then make sure you find a good tri bike fitter and go to work on your position. After training, it’s the single biggest determinant of how fast a bike/run combo you can put together.
Contact Points
Even the best bike fit can be brought undone by the wrong components. This point is very closely related to the bike fit points raised above, so it falls into the ‘icing on the cake’ category, but you need to ensure that the three places where you touch the bike are working for you – seat, bars and pedals. I’ll go through them individually and explain why these three bits of the bike are more important than things like your wheels or group set selection.
Saddle: there are two things that we all need our saddle to do: support us so we can put out power without injuring us, and support function, which seems self evident but it’s amazing how many triathletes use seats that don’t support their pelvis or force them to move too far forward/rearward to try and find a place to perch. Some people just don’t know any better and assume that this is ‘normal’. It’s not – there is a seat out there for you that will support your pelvis and allow you to sit in the seat and just pedal (which is, after all, the whole point). Now you’re going to ask me “Which saddle is this?” Sadly, I don’t know, and neither does anybody else. Getting the right seat is more about trial and error and less about science. There are some great tri-specific saddles on the market now but that is no guarantee of it being right for you. Find a shop with a test program and work with the fitter – trial and error is your friend.
Bars: Most bars can be made to fit most people, sort of. My main concern with many of the aerobars on the market is that the pads are set too narrow for our swimmers upper bodies and for the duration some of us are going to be on the bike. A general lack of adjustment would be my second criticism. Ensure that the armrest pads go wide enough to support your skeleton and allow your chest to breathe. General adjustment can be sorted during fitting but make the bars fit you – not the other way around.
Pedals: It’s really the cleat shoe interface that is crucial here. Cleat set up and shoes are a whole discussion in and of themselves so I’m going to cut it right down and just summarise. Your shoes should be comfortable and not give you pins and needles or numb feet – ever. The set up of your cleats is not a random act. The wrong setup will greatly increase your chance of injury and the correct setup will allow you to generate a bit more power with a bit less effort. In short, this is a job for a good bike fitter to help you solve, it’s not something you want to chance on your own.
Aero Stuff
This is the bling bit. The aero stuff is what’s offered up as the Holy Grail of the successful triathlete. Aero frames, aero helmets, aero wheels, even aero pedals! It’s the most fun part of bike speed (who doesn’t like buying new aero stuff), but it also raises an interesting problem. I call it the aero anomaly or the aero black hole. If you add up all the aero savings that are on offer in terms of frames, wheels, drink bottles and everything else, then the leaders at Kona should now be biking around four hours flat. The thing is that they don’t. There is a gap between the measurements out of the wind tunnel for each bit of kit and what we see in reality. Don’t get me wrong, I’m not saying that the tunnel data is wrong, it isn’t. The theoretical drag savings that are being measured in the tunnel are real. It’s just that they are real in the tunnel. Somewhere between the wind tunnel and the real world some of these combined aero savings just slip away, which is why you see bike times of 4:20 the norm. Still, some drag reduction is better than no drag reduction. Your priority of aero stuff should be as follows…
- Comfortable aero position on the bike you can sustain for the duration of the ride: you are, after all, the biggest source of drag
- Tight clothing, no straps flapping in the breeze
- Aero helmet: your head is the second biggest cause of drag
- Aero wheels: these work almost as well as the helmet and look cool
- Aero frame: smaller time savings but also looks cool
- Aero everything else: aero water bottles and aero bento boxes are really pushing into the 0.1 per cent of the solution, but hey, every bit counts right?
And so that’s about it. I’m a self confessed gear head and I love all the new stuff that we as triathletes get to play with, but if you are serious about having a great bike/run combo, you need to get the fit and the component selection right before you worry too much about anything else. It’s a simple equation – get to the run as fast and as comfortable as possible and don’t get injured.


Comments ()